These days, the “Reviews” section is almost mandatory for every e-commerce website. Being social creatures, we tend to pay attention to other people’s opinions about products we consider buying. WooCommerce has an in-built feature that allows your customers to leave reviews about products you sell and even give ratings to them. However, the default WooCommerce form is pretty basic, so many WooCommerce store owners look for ways to extend it.
Today, I’m going to show you how to add custom fields to the WooCommerce review form without plugins. All we’re going to use is PHP and some built-in WordPress and WooCommerce features.
Introduction
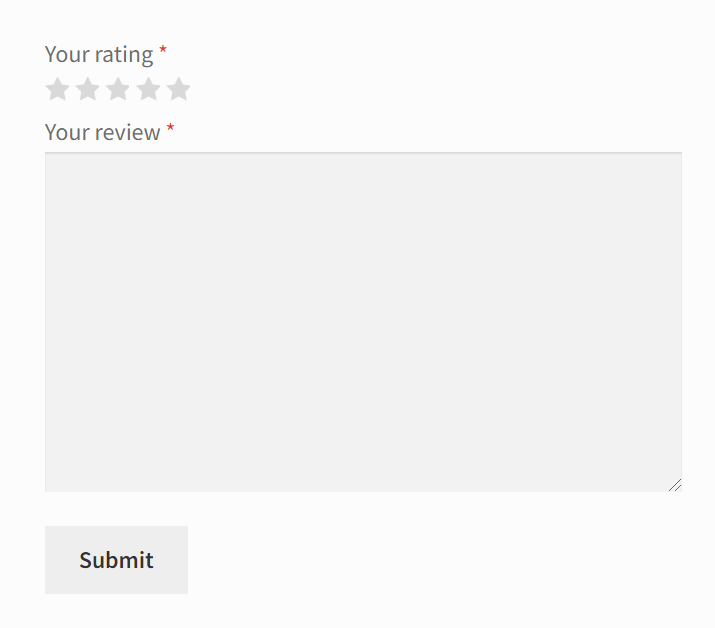
By default, the WooCommerce review form has only two fields: “Your rating” and “Your review”. Unauthorized users also have to provide their name and email address. If you haven’t installed any plugins modifying the review form or if your theme doesn’t do it out of the box, the review form on your website should look like this:
In this post, I’m going to show you how to add two additional fields to the review form: “Pros” and “Cons”. I bet you’ve seen something like this on other websites. A quick summary of a product’s positive and negative sides allows you to quickly understand if it is worth the money. Here’s an example of how an extended review block may look like I took from one of the Ukrainian online marketplaces.
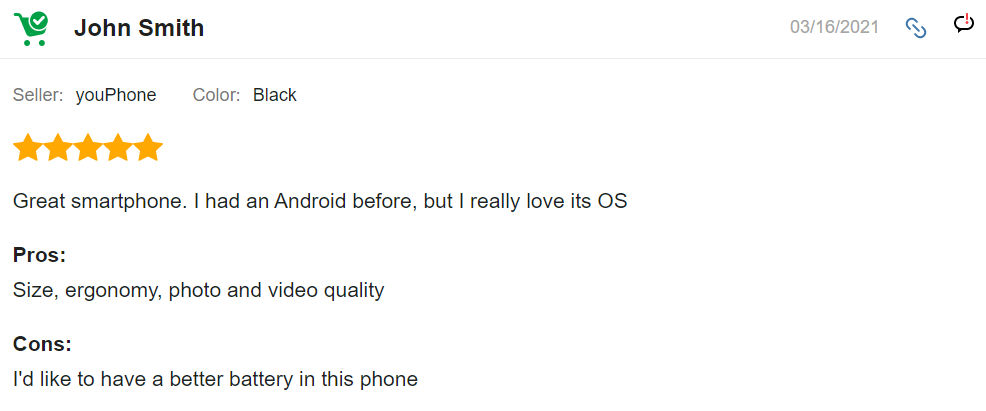
I guess you understand what we’ll try to achieve today, so let’s start writing the code.
The problem
First of all, you need to understand that the WooCommerce review form is a modified WordPress comment form. Under the hood, WooCommerce uses the comment_form() function.
When I started investigating this question, I found out that there’s no easy and straightforward way to add custom fields to the WordPress comment form. There’s no single hook you can easily use to add custom fields to the form. Instead, there’s a lot of action and filters hooks you’ll have to use if you decide to modify the WordPress comment form.
In this post, I’m going to show you how to add a custom field at the beginning of the comment form and after the comment text field.
How to add a field at the beginning of the review form
If you want to add a custom field at the beginning of the review form (before the rating field and after the authorization notice for the anonymous users), you’ll have to use two different hooks for the same field. That’s because WordPress handles the displaying of the form differently based on if a user is authorized or not.
For the anonymous users, we’re going to use the comment_form_defaults hook. Using this hook, we can modify the default arguments of the comment form. We need this hook to show our custom fields after the “Your email address will not be published” notice. More specifically, we’ll just append our fields HTML to the comment_notes_before form’s argument.
For the authorized users, we’re going to use the comment_form_top hook. This hook “fires at the top of the comment form, inside the form tag“, as the documentation says.
To make sure that we modify only the WooCommerce review form, we’re going to use the is_product() conditional tag. And to make sure that we won’t duplicate the fields, we’re going to use the is_user_logged_in() function.
Here’s the code I wrote:
<?php
add_filter( 'comment_form_defaults', 'render_pros_cons_fields_for_anonymous_users', 10, 1 );
add_action( 'comment_form_top', 'render_pros_cons_fields_for_authorized_users' );
function get_pros_cons_fields_html() {
	ob_start();
	?>

	<div class="pcf-container">
		<div class="pcf-field-container">
			<label for="pros">Pros:</label>
			<input id="pros" name="pros" type="text">
		</div>

		<div class="pcf-field-container">
			<label for="cons">Cons:</label>
			<input id="cons" name="cons" type="text">
		</div>
	</div>

	<?php
	return ob_get_clean();
}

function render_pros_cons_fields_for_authorized_users() {
	if ( ! is_product() || ! is_user_logged_in() ) {
		return;
	}

	echo get_pros_cons_fields_html();
}

function render_pros_cons_fields_for_anonymous_users( $defaults ) {
	if ( ! is_product() || is_user_logged_in() ) {
		return;
	}

	$defaults['comment_notes_before'] .= get_pros_cons_fields_html();

	return $defaults;
}
Also, I added a bit of CSS to make the new fields look better on the frontend:
.pcf-field-container {
	padding-top: 5px;
	padding-bottom: 5px;
}

.pcf-field-container label {
	display: block;
}

.pcf-field-container input {
	display: block;
	width: 100%;
}
Let’s check what our new fields look like for an authorized user.
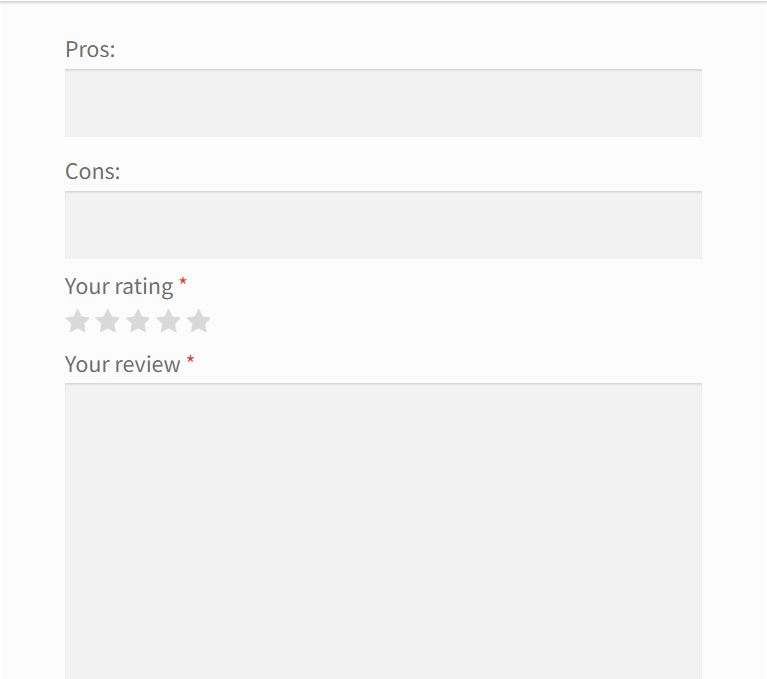
As expected, the new fields are rendered right before the rating field. Does it work for anonymous users too?
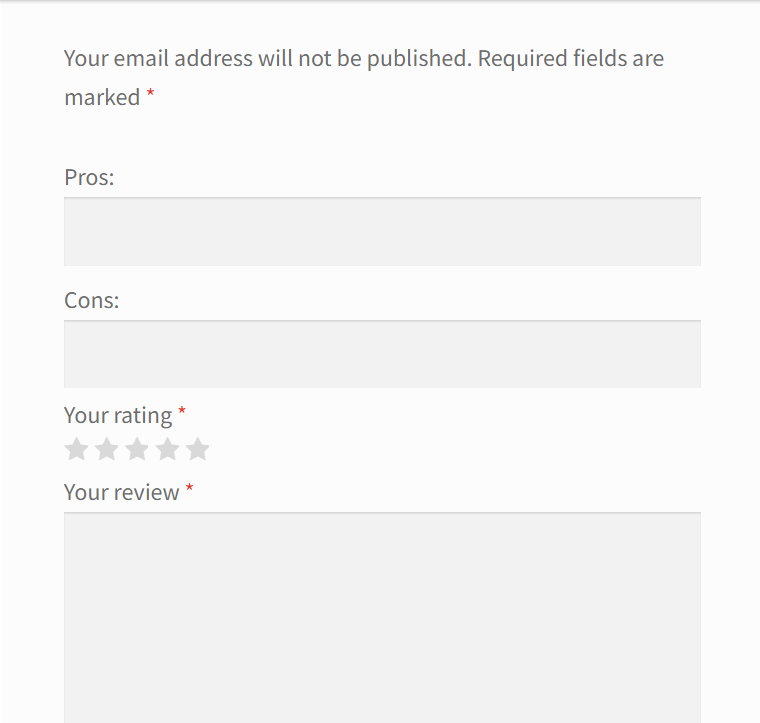
Yup, our new fields are displayed right after the notice.
How to add a field after the comment text field
If you want to show your custom fields after the “Your review” field, you’ll have to use a different hook. Luckily, this time we can use only one hook because the comment text field is rendered the same way for both authorized and anonymous users. The hook we’re going to use is comment_form_field_comment. This hook allows us to modify the HTML code of the comment field.
Here’s the code you can use to achieve this:
<?php
// DO NOT ADD THIS FUNCTION AGAIN IF YOU'VE ALREADY ADDED IT IN THE PREVIOUS SECTION
function get_pros_cons_fields_html() {
	ob_start();
	?>

	<div class="pcf-container">
		<div class="pcf-field-container">
			<label for="pros">Pros:</label>
			<input id="pros" name="pros" type="text">
		</div>

		<div class="pcf-field-container">
			<label for="cons">Cons:</label>
			<input id="cons" name="cons" type="text">
		</div>
	</div>

	<?php
	return ob_get_clean();
}


add_filter( 'comment_form_field_comment', 'render_pros_cons_fields', 99, 1 );
function render_pros_cons_fields( $comment_field ) {
	if ( ! is_product() ) {
		return $comment_field;
	}

	return $comment_field . get_pros_cons_fields_html();
}
Let’s see what we’ve got in the review form now:
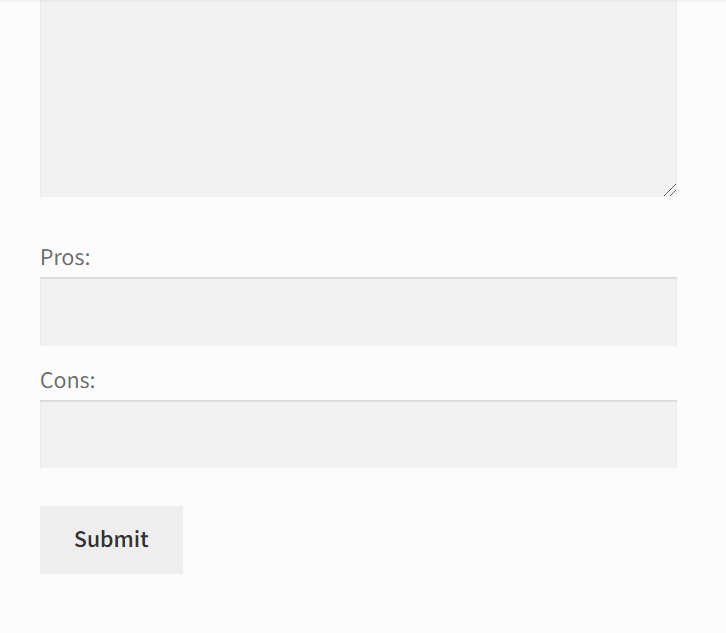
By the way, you can rewrite the render_pros_cons_fields function a little bit to render the fields BEFORE the comment field. In this case, you would need to return this:
return get_pros_cons_fields_html() . $comment_field;But I want to note that this code won’t guarantee that your custom fields will be displayed at the beginning of the form, because one of the plugins you use or the theme you use may modify the comment form using the hooks I’ve described above or other hooks that fire earlier than comment_form_field_comment. Anyways, feel free to experiment with this hook to find the most suitable way for your case.
How to save the custom data
Okay, we’ve got our custom fields in place. The problem is that they won’t be saved automatically: you have to write some code to save the custom fields’ values. To do this, you need to use the comment_post hook. This hook is triggered right after a comment was added to the database, but:
- You still have access to the $_POST variables
- You can access the ID of a new post
WordPress comments can have their meta data just like posts and users do. So we’re going to store the pros and cons a user has submitted as a comment’s meta. Let’s see how we can do that:
add_action( 'comment_post', 'save_review_pros_and_cons', 10, 3 );
function save_review_pros_and_cons( $comment_id, $approved, $commentdata ) {
	// The pros and cons fields are not required, so we have to check if they're not empty
	$pros = isset( $_POST['pros'] ) ? $_POST['pros'] : '';
	$cons = isset( $_POST['cons'] ) ? $_POST['cons'] : '';

	// Spammers and hackers love to use comments to do XSS attacks.
	// Don't forget to escape the variables
	update_comment_meta( $comment_id, 'pros', esc_html( $pros ) );
	update_comment_meta( $comment_id, 'cons', esc_html( $cons ) );
}
How to display a comment with the custom data
You can just believe me that the code above works, but you can’t check it without opening the database. Let’s add the pros and cons a user has submitted to their comment’s text. To do this, we can utilize the comment_text filter hook. This hook allows us to modify a comment’s text, so we can add the pros and cons just before the comment’s main text.
add_filter( 'comment_text', 'add_pros_and_cons_to_review_text', 10, 1 );
function add_pros_and_cons_to_review_text( $text ) {
	// We don't want to modify a comment's text in the admin, and we don't need to modify the text of blog post commets
	if ( is_admin() || ! is_product() ) {
		return $text;
	}

	$pros = get_comment_meta( get_comment_ID(), 'pros', true );
	$cons = get_comment_meta( get_comment_ID(), 'cons', true );

	$pros_html = '<div class="pcf-row"><b>Pros: </b>' . esc_html( $pros ) . '</div>';
	$cons_html = '<div class="pcf-row"><b>Cons: </b>' . esc_html( $cons ) . '</div>';

	$updated_text = $pros_html . $cons_html . $text;

	return $updated_text;
}
By default, our new blocks will look a bit messy, so let’s add a bottom margin to make them look a bit better:
.pcf-row {
	margin-bottom: 10px;
}
Now, if I leave a review for a product filling the pros and cons fields, I’m going to see them as a part of my review:
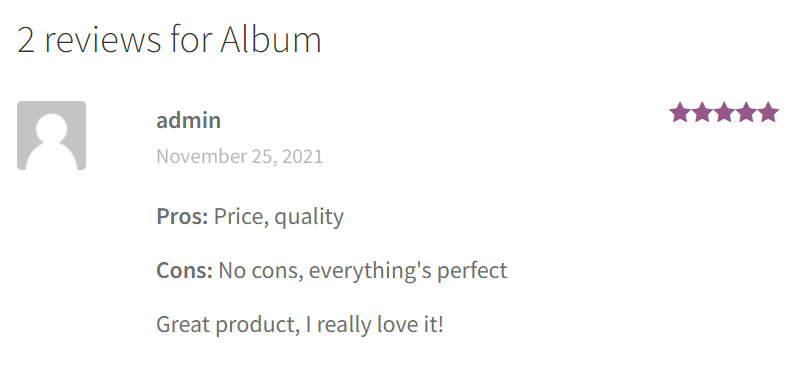
How to make the custom fields modifiable from the admin dashboard
Good news: we’re almost done. The last thing we need to do is to make the pros and cons meta fields modifiable from the admin dashboard. That’s a cool feature to have if you want to moderate what your users type in those fields.
If you go to the Comments page, and click the “Edit” link under a new comment, you’ll see something like this:
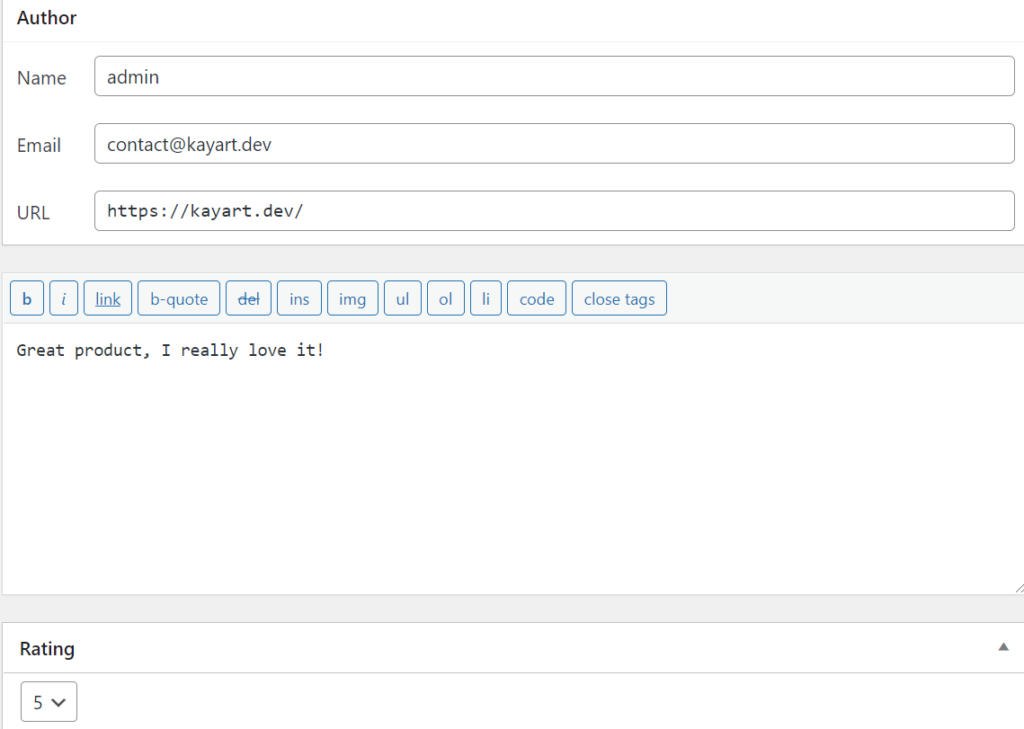
You can edit any default field, but you can edit the custom fields you’ve added before. Let’s add a new meta box that will allow us to edit the fields from the admin dashboard.
We can do this using the add_meta_boxes_comment hook along with the add_meta_box function.
<?php
add_action( 'add_meta_boxes_comment', 'extend_comment_add_meta_box', 10, 1 );
function extend_comment_add_meta_box( $comment ) {
	// We don't need to show this metabox if a comment doesn't belong to a product
	$post_id = $comment->comment_post_ID;
	$product = wc_get_product( $post_id );

	if ( $product === null || $product === false ) {
		return;
	}

    add_meta_box( 'pcf_fields', 'Pros & Cons', 'render_pcf_fields_metabox', 'comment', 'normal', 'high' );
}

function render_pcf_fields_metabox ( $comment ) {
    $pros = get_comment_meta( $comment->comment_ID, 'pros', true );
    $cons = get_comment_meta( $comment->comment_ID, 'cons', true );
    wp_nonce_field( 'pcf_metabox_update', 'pcf_metabox_nonce', false );
    ?>
    <p>
        <label for="phone">Pros:</label>
        <input type="text" name="pros" id="pros" value="<?php echo esc_attr( $pros ); ?>" class="widefat" />
    </p>
    <p>
        <label for="cons">Cons:</label>
        <input type="text" name="cons" id="cons" value="<?php echo esc_attr( $cons ); ?>" class="widefat" />
    </p>
    <?php
}
Now, if I open the comment editor again, I’ll see the new metabox under the “Rating” metabox:
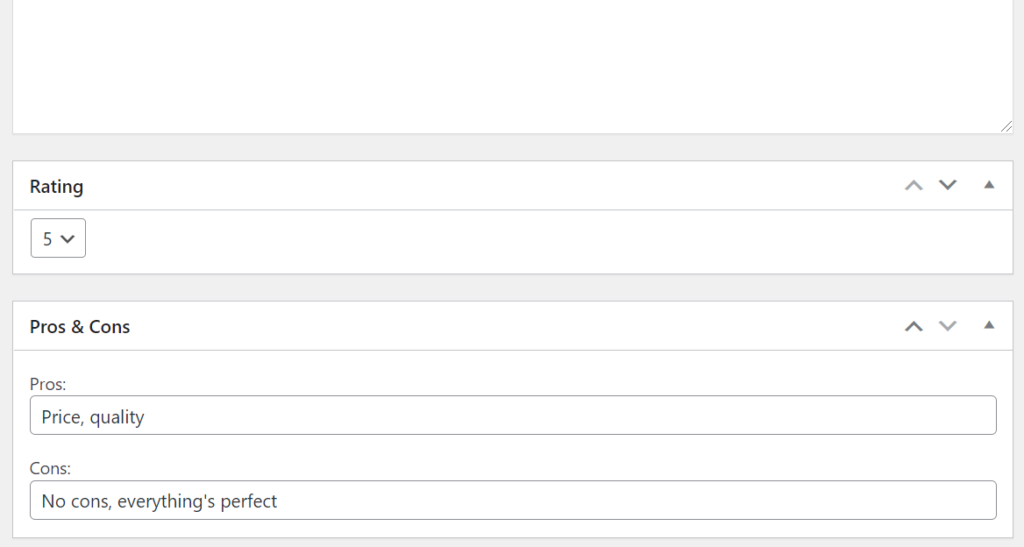
The values of the custom fields are now visible in the comment editor, but if you try to edit them and save your changes, you won’t see your changes after a page will be reloaded. To fix that, let’s use the edit_comment hook to handle the updates of the fields:
add_action( 'edit_comment', 'save_pcf_changes', 10, 1 );
function save_pcf_changes( $comment_id ) {
	// First of all, let's validate the nonce
	if ( ! isset( $_POST['pcf_metabox_nonce'] ) || ! wp_verify_nonce( $_POST['pcf_metabox_nonce'], 'pcf_metabox_update') ) {
		wp_die( 'You can not do this action' );
	}

	if ( isset( $_POST['pros'] ) ) {
		$pros = $_POST['pros'];
		update_comment_meta( $comment_id, 'pros', esc_html( $pros ) );
	}

	if ( isset( $_POST['cons'] ) ) {
		$cons = $_POST['cons'];
		update_comment_meta( $comment_id, 'cons', esc_html( $cons ) );
	}
}
Now, you can easily edit the custom fields we’ve added straight from the admin dashboard.
Summary
Phew, there were a lot of nuances for such a simple goal. Although I’ve shown how to add text fields to the WooCommerce review form, you can use any other field type you need: number, date, select, etc.
Anyways, I hope you found this post helpful. Feel free to share your opinion or ask any questions in the comments section below.
Thank you for your attention; see you in the next one!

Hi,
Your article is wonderful and the code works like a charm.
However, I have a custom requirement. Hope you could assist. I want to update my custom product review fields via Woocommerce API. I tried the below but it doesn’t work.
Hi Anuranjan! Thank you for your comment. I don’t get what exactly you’re trying to achieve. Do you use WordPress as a headless CMS for your store?
Where is the info stored? How to protect against all kind of attacks?
Your work is super important, thank you 🙂
Hello Luis! Thank you for your comment. As I wrote in the How to save the custom data section, these fields are stored as a comment’s meta fields. About the possible attacks: it really depends on what you mean. Basic rules: always sanitize, escape, or validate the values you’re inserting into the database. If you meant possible spam attacks, you can use anti-spam plugins or add a captcha: usually, it’s more than enough to stop bots.
How should do or how to avoid the output of pros or cons if I want to add just 1 flied for to title and don’t wanna come out the text title after sending a review, just the content?
Thanks for great job
Hi! Thank you for the comment.
I’m not sure what you need. If you want to have only one text field, just use my code and remove the second field’s HTML and backend processing.
Can I add the code via a plugin snippets or I must create the child file at any way!? Thanks for that by the way awesome work man
Yeah, you can use a custom snippets plugin
Hi Kayart,
This is an update! Thanks again,
Just got 2 queries
1) I just added only the 1st field (pros) but for my review title and set the font-weight: bold CSS to pcf-row class, but I’d like to include the second “cons” field for “type of trip” e.g with family, solo, couple as my web is a travel agent, but it would be displayed below the 1st, I know it, but in the same way I mean “bold” as both have the same class = pcf-row. Is it posible to add or include a diferente class just for this 2nd field and that way it can be display as default (regular font weight)?
2) Also Would it be possible to add a Image or it can make complicated the storing/saving into the data, at least 1 image perhaps 2?
Additionally where exactly should I type “required” to make the 1st field or both as required?
Thanks heartily
It is working by the way I added using a plugin for snippets
1) Sure, you can add any classes you want. Take a look at the render_pros_cons_fields_for_authorized_users function from my post. I render the HTML code of the field myself which means that I can modify it any way I want.
2) Yes, it is possible with some custom code. Maybe I’ll write a post on how to do this in the future, thank you for the idea. You can hire someone to code it for you or you can use a plugin like Customer Reviews for WooCommerce that already has this feature out of the box.
Wow, it’s working! Great job
Would it be possible to display the fields over/before the stars, client name and date and not below the client name and date
Thanks for sharing BTW
Hi Mark! Yes, it is possible.
But remember that these fields (name, email) are visible only to unauthorized users. If you want to show your custom fields for all users (no matter if they are logged in or not) the easiest way for you is to modify templates/single-product-reviews.php template.
If you don’t know how to modify a WooCommerce template properly, read this:
https://woocommerce.com/document/template-structure/
you are a lifesaver 🙂 thank you very much,
just a question if you don’t mind, is there a way to play on the main layout of the review form, ofc we have the ability of editing whatever styling and also adding any type of field, but can we for example, include the default comment field also name and email in a container,… I want. to have a layout of two columns where each one has set of fields
Hi Boby! I’m not sure what exactly you want to achieve, but take a look at this comment in which I shared some links that will be useful for you if you want to modify the default comment form template:
https://kayart.dev/how-to-add-custom-fields-to-the-woocommerce-review-form/#comment-105
Thanks mate! I had made a custom review form but didn’t have the edit capability and you provided with the perfect code for that.
As a sidenote, if you’re going totally custom (I manage the review in xhr), you can submit the reviews with the wp_insert_comment funtion in one go (“comment_type” is “review” and “comment_meta” holds all of your custom metas (plus order_id and rating as default).
Thank you for your comment, Buzut, happy to help 🙂
Hey Artemy – this worked great, thanks. The only thing I struggled with is I wanted a field in between “Name” and “Email”, or at least after email. Is this possible with a hook instead of making a custom template? I’m guessing placing a field after the email field would be easiest because we don’t have to worry about logged in or not, but I tried the comment_form_default_fields and a couple others without any luck.
Also, I hope you don’t mind me saying Slava Ukraini.
Hi Adam, thank you for your comment!
Have you tried using comment_form_field_author hook?
This filter hook should work similarly to what you can see in the How to add a field after the comment text field section of this post. We take the field’s HTML code and add our custom fields’ HTML to it which allows us to render the custom fields straight after the comment text field.
Ah that works perfectly, thank you – I find the WordPress reference difficult to search so I didn’t see these hooks. And in fact your link also helped me deal with an issue with the cookie consent text that I was confused by. Thanks again!
Yeah, sometimes you need to see the source code to understand how everything works under the hood 🙂
Always happy to help!